How to Dutch Braid Step by Step: A Realistic and Easy Guide
Dutch braiding might look like something only hairstylists or YouTubers can pull off, but the truth is: anyone can learn it. Whether you want to keep your hair out of your face for a workout, create a fun weekend look, or just try something new, this braid adds structure and beauty to any hair type. And while it might take a bit of practice, the actual technique is pretty simple once you get used to it. This guide breaks it down into manageable steps, with a human-centered approach—because we all know real life isn’t as neat as tutorial videos.
1.Prep Your Hair for Braiding
Start by brushing your hair thoroughly. Smooth, tangle-free hair makes the braiding process a whole lot easier and less frustrating. If your hair is freshly washed and too soft, you might find it slippery and hard to manage. In that case, apply a bit of dry shampoo, texture spray, or even a light mousse to give your hair some grip and hold. This is especially helpful if you’re braiding your own hair, since you’ll want it to stay put while your arms are working overtime behind your head. If you’re working with second-day hair, even better—it tends to hold braids more easily without needing extra product.
2.Create Your Starting Section
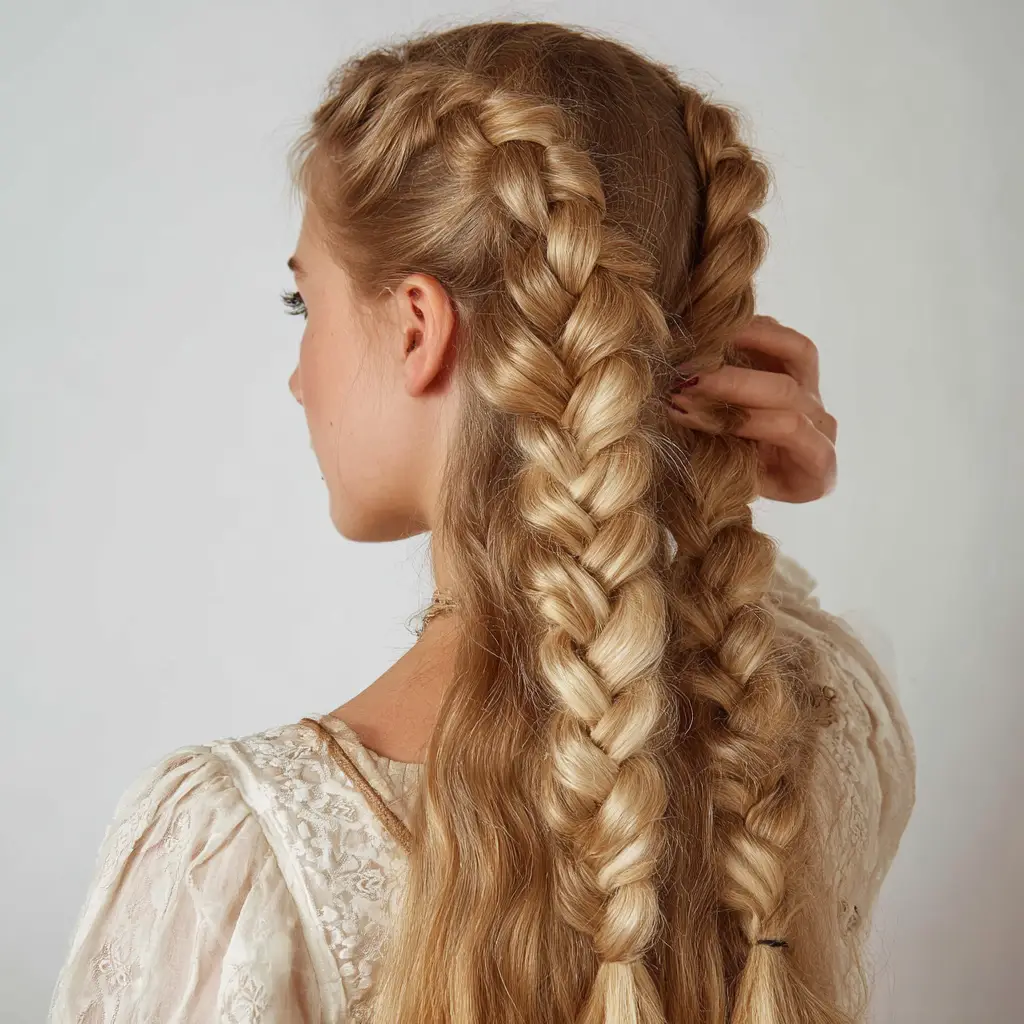
Use your fingers or the tip of a comb to part a section of hair from the very top center of your head, right near your forehead. Imagine drawing a triangle with the tip at your hairline and the base extending back toward the crown. This triangle is the base of your braid, and how clean you make this part can affect how polished your final look appears. If you prefer a messier or more boho vibe, you can part it roughly with your fingers. For a sleek and sharp braid, use a rat-tail comb for precision. Clip the rest of your hair out of the way if needed so it doesn’t interfere while you start the braid.

3.Divide That Section into Three Equal Strands
Now, take that front section and separate it into three even strands. These strands will be your core braiding sections. It doesn’t have to be perfect, but try to keep them as equal as possible in thickness—this helps your braid look balanced and tidy. Hold two strands in one hand and one in the other, whichever feels most natural to you. You might need to experiment with grip, especially if you’re braiding your own hair and your arms start to get tired (which they probably will at first—don’t worry, it’s normal!).

4.Begin the Dutch Braid by Crossing Under
This is where the Dutch braid really starts to take form. Begin by taking the right strand and crossing it under the middle strand. Then take the left strand and cross it under the new middle strand. The key here is under, not over—that’s what gives the Dutch braid its distinctive raised appearance. You’re essentially doing a reverse French braid. At this point, you’re starting to see the structure of the braid form. Don’t stress if it looks flat right now—it’ll pop more as you go.

5.Add Hair to the Right Strand and Braid It Under
Now you’re going to start feeding in hair to create that beautiful, seamless braid that hugs the scalp. Grab a small section of loose hair from the right side of your head and add it to the right strand. Try to pick up hair close to the braid so it looks natural and stays tight. Once you’ve added the hair, cross the entire right section (original strand + added hair) under the middle. Keep a firm but gentle tension so the braid stays neat without pulling uncomfortably at your scalp. This step can be repeated as you move down the braid.

6.Add Hair to the Left Strand and Braid It Under
Repeat the same motion on the left side. Gather a small section of loose hair from the left side of your head, add it to the left strand, then pass it under the middle. Keep your movements smooth and deliberate—rushing can lead to uneven braids or lumps. The beauty of a Dutch braid is in its definition, and consistency in how much hair you add each time really helps. Make sure you’re drawing the added hair in a straight line across the scalp to keep the braid centered as you work downward.

7.Keep Braiding Down the Head
Continue alternating sides: add hair to the right strand, cross under the middle; add hair to the left strand, cross under the middle. Work your way slowly down the back of the head. If you’re braiding your own hair, this is the part that might feel the most awkward, since you’re working behind your head. Use a handheld mirror or even record yourself with your phone so you can see what’s going on. Don’t worry if it doesn’t look perfect your first few tries. Focus on consistency and tension. The more evenly you feed in hair, the neater your braid will be.
8.Finish with a Regular Braid
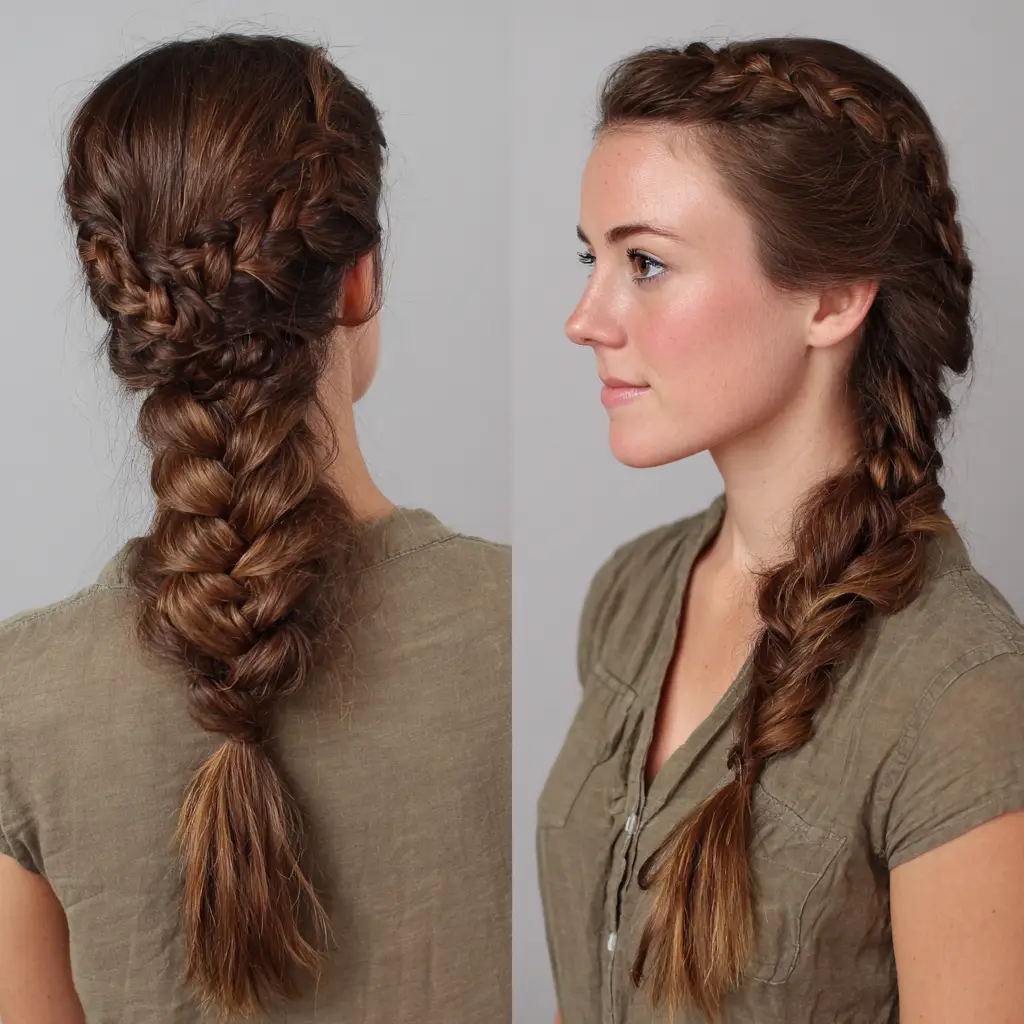
Once you’ve added all the available hair—usually right at or just below the nape of your neck—continue with a standard three-strand braid. At this point, you’re no longer adding in new hair, just crossing the strands under each other in the same order you’ve been doing. Maintain the same under-crossing pattern to keep the braid’s appearance uniform from top to bottom. Braid all the way to the ends of your hair, or stop wherever you like depending on the style you’re going for.

9.Secure the Braid with an Elastic
Tie off the braid using a small elastic band. Clear elastics are great for a more polished or invisible finish, but a scrunchie or decorative tie can also add a cute touch. If you want more volume or a looser feel, gently pull the outer edges of the braid—this is called “pancaking.” It makes the braid look thicker and more relaxed, perfect for casual or romantic looks. Don’t be afraid to play around with this; it’s a great way to cover up any small mistakes and make the style look fuller and softer.

10.Smooth, Set, and Enjoy
Finish off by smoothing any flyaways with hairspray, styling gel, or even a bit of hair oil. If you’re going for a sleek look, a toothbrush with a touch of styling cream is great for taming baby hairs around your hairline. Want it messier? Let a few front strands fall naturally. You can also use bobby pins to secure the braid if it feels loose, especially at the start. And just like that—you’ve done it. Whether it’s a little messy or perfectly tight, you created a Dutch braid with your own hands. That’s a win.

Frequently Asked Questions
What’s the difference between a Dutch braid and a French braid?
A Dutch braid is basically a reverse French braid. With Dutch, you cross the strands under the middle one, which makes the braid sit on top of your hair. With French, you cross over, and the braid blends into the hair.
Is it hard to braid your own hair?
At first, yes—it can be tricky. But with practice, your hands will get used to the motion, and it becomes much easier. Start slow and don’t worry about making it perfect.
How long does my hair need to be?
You can Dutch braid hair that’s at least shoulder length. Shorter hair might need more pins to secure the ends or sides.
Can I braid wet hair?
You can, but Dutch braiding wet hair can be tighter and more difficult to adjust. If you’re going for heatless waves, though, braiding damp hair overnight can give you beautiful results.
What if my braid looks messy?
That’s okay! The first few times will probably look a bit off. Messy braids are still stylish, and each try gets you closer to nailing it.
Conclusion
Learning how to Dutch braid is like learning to ride a bike. The first tries are awkward, maybe even frustrating, but once you get the rhythm, it becomes second nature. You don’t need perfect hair, fancy tools, or superhuman coordination. Just some time, your hands, and a willingness to try.

